Monday 21 October 2013

Desk, Mk02

Rolling into third year of mechanical engineering (2013) I needed a new desk.  I had refurbished one before, it was a rescue from the Dunn building, a 1950's vintage with some clever elements to it so I wanted another like it.  I found one on Kijiji that was free to anyone who would drag it off - my mother's poor little Suzuki SX4 just barely contained it.
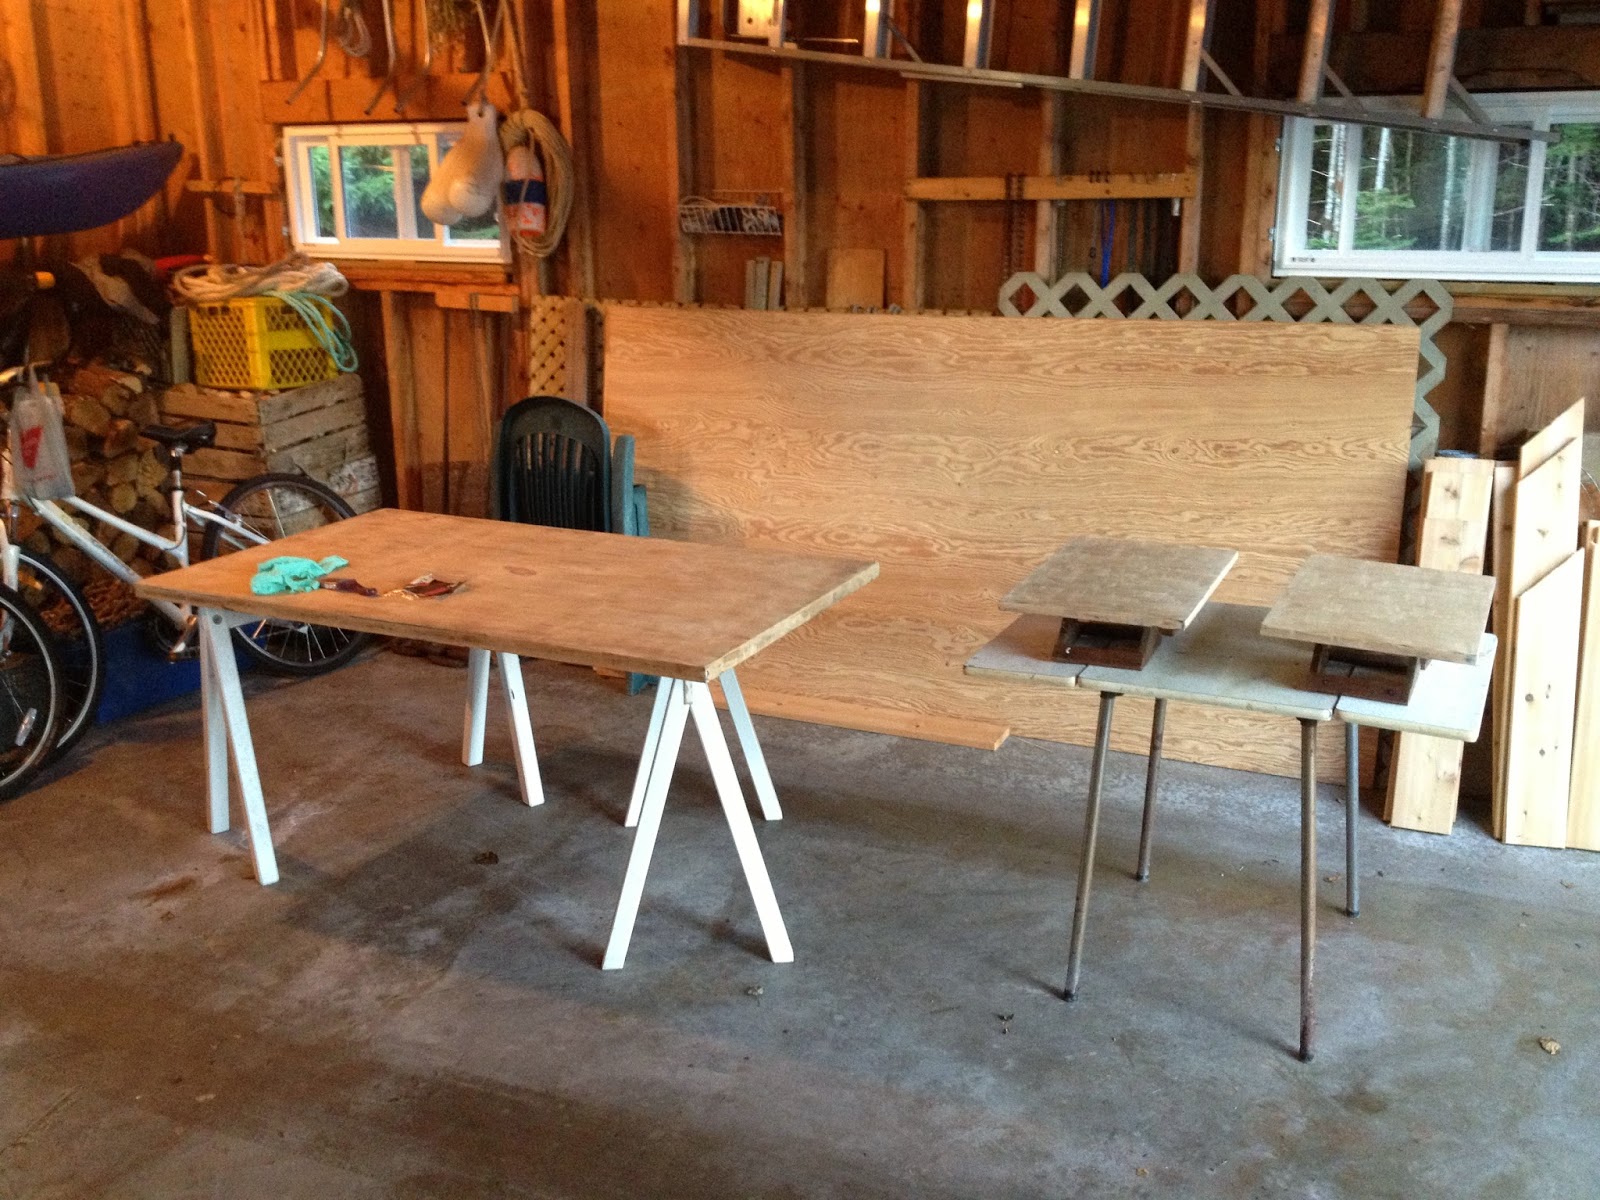
Once home, it was time for a tear down and sand of all the panels, which required yet another invasion of my parent's garage.


The parts on right are the pair of pull-out work surfaces, one of the features I really enjoyed.  The oak veneer on the desk top didn't sand as evenly as I had hoped so I had to go to a black stain to cover up those 'little sins'.


A previous owner had cut off the legs, likely to have it fit through a door frame, but had simply reattached them using a single metal bracket on each leg.  I upgraded the assembly using hanger bolts and thread inserts.  I also added threaded glides to each of the legs.


Stain and primer.


Finished product, including my original driftwood monitor stand.  I lucked out for hardware as my mom had unused handles she had picked it up at a Rona close-out sale that she contributed to the cause.


Expandable work surface in action.


Sunday 22 September 2013

Hexagon Plant Pots

After casually searching for months for new plant pots I finally accepted the fact that I just wasn't going to find any I liked and set out to build my own.  I had recently watched a documentary on honey bees and was inspired by the little critters.
To simplify the fabrication process I drew up the plans in SolidWorks and used 1:1 draft files as templates and references.


Then I had to figure out what I wanted to do for arrangements and side heights.  Seven seems to be a good number, it allowed good versatility in arrangement and would accommodate all my plats with pots to spare.


Found a lot of interesting resources on geometry and drawing hexagons.


The sides are screwed into the base, the vertical seams were fixed with Gorilla glue; I used my kayak straps as circumferential clamps for the process, though ratchet straps may have worked better.  I used a belt sander to even-out the top edges once the glue had set.


Wood filler did the rest.


I used roofing cement to seal the seams, though I made the mistake of spraying the insides with a high-build undercoating afterwards.  The undercoating attacked the cement and compromised the seals - note to self: don't mix bitumen products and aerosol solvents.
Next was paint: the grey was simply some leftover interior paint.  In order to speed up the drying process in an otherwise cool and damp basement, I recruited the dehumidifier.


Next I used some dark green acrylic craft paint in a two step process for the finish:  First I watered some down and used a cloth to apply it over the grey, then I used the same cloth but bunched up to dab on the marble pattern using undiluted paint; the canvas in the background was my test subject.


Finally I lined the bottoms of the pots with plastic bags and taped them in place - just to be sure there wasn't going to be any issues with leaks.  For fill I used 3cm or so of pea-gravel in the bottom, followed by landscape fabric, then potting soil, and plants - clearly.


Monday 17 June 2013

2001 Ninja ZX9R Rebuild


Sometimes projects are not born out of inspiration, rather out of misfortune.  My motorcycle rebuild was certainly the latter, because sometimes life gives you guard-rails, and you don't have much choice but to take'm.

Emergency room, 2011

Luckily I had my rain gear on me so I had something to put on to keep me from going into shock, though I would have rather been less aware for loading my wrecked bike onto the tow truck - pushing that thing up the ramp with a subluxed shoulder sucked.  Though the rain-suit did keep me from bleeding on the interior of the tow truck, and the driver was kind enough to drop my bike at the shop and then me at the emergency room.
It was two years after the accident before the desire to ride again really took hold but in May 2013 it finally did and I had the time; and so the occupation of my parent's garage began.


The major damage was a bent front sub-frame, I got lucky and found a used one for on ebay from a salvage yard in Virginia.  The rest of the damaged/missing parts were more common bolt on parts like foot peg, stator housing, and levers.

I had to get creative to separate the swing arm from the front sub-frame.  I got the locking nut off with a tool I made out of a bit of appropriately sized pipe from the metal shop using an angle grinder, and the pin came out with a bolt with a 22mm head turned hex-wrench that the guy at the industrial hardware store was kind enough to give me -many thanks.


Then back together she went, I was very thankful for the shop manual I had purchased before hand, though I wish I had of bought my digital torque gauge earlier, my manual one just didn't have the range I needed.


My father was skeptical of the chain hoist at first but it has become his new favorite toy - his boat has spent more time in the air now than in the water:


Before I put the exhaust manifold back on I gave it a coat of ultra high temperature paint - Nova Scotia is murder by rust to bare metal parts like this.


Once it was all back together and the mechanic had given me a cursory approval of its road-worthiness, it was was on to aesthetics:  rebuilding the lower fairings with fiberglass, new paint, new LED signals and tail lights.


Now there was one little detail that I did not appreciate in the mechanic's assessment: my bike now has a new sub-frame, the sub-frame is where the VIN number is stamped, the VIN that is now on my bike belongs to a 'salvage' bike from the US...  Turns out the easy part was the rebuild.  Now I had to get the motorcycle inspected by a red-seal mechanic in order to get the 'salvage' title changed to a 'rebuild' - turns out there was only one mechanic in the city qualified and willing to assist, flatteringly enough he offered me a job when I brought it in, needless to say the bike passed.  Next I had to create a photo-documentary for the RCMP to show that the frame was in fact used to rebuild a Canadian motorcycle - as opposed to me being involved in some cross-border insurance fraud.  Once this document was submitted, then I got a visit from the regional police to inspect the vehicle.  After all this, I was able to register my new, old, rebuilt, salvaged motorcycle; though I now apparently have a motorcycle forever registered to my name - the old VIN, RIP.